
Install and Configure OpenLDAP on Ubuntu 18.04
[ This post is part of my ongoing instructional series on setting up some baseline IT infrastructure for the fictional startup Shoestring Lab. Shoestring has committed to using Open Source wherever possible. Shoestring Lab has standardized on Ubuntu for its server and desktop/laptop computer systems.
Today's lesson
As the admin for Shoestring Lab, you need to install OpenLDAP server to manage users and groups for various network services.]
OpenLDAP is an open source directory server and authentication system that successfully scales to billions of records and is used around the world. I like it because it is a mature and rock solid solution for the common problem of authentication in networked applications. Installing and configuring it on Ubuntu 18.04 requires a little bit of patience and some basic information about your implementation. I will show you how to install the OpenLDAP server, LDAP utils, and Apache Directory Studio for use as an administrative tool.
Installing OpenLDAP
First, let's install the packages:
$ sudo apt install slapd ldap-utils
Change the root password if needed:
$ slappasswd
Configuring OpenLDAP
Enter the command to configure slapd:
$ sudo dpkg-reconfigure slapd
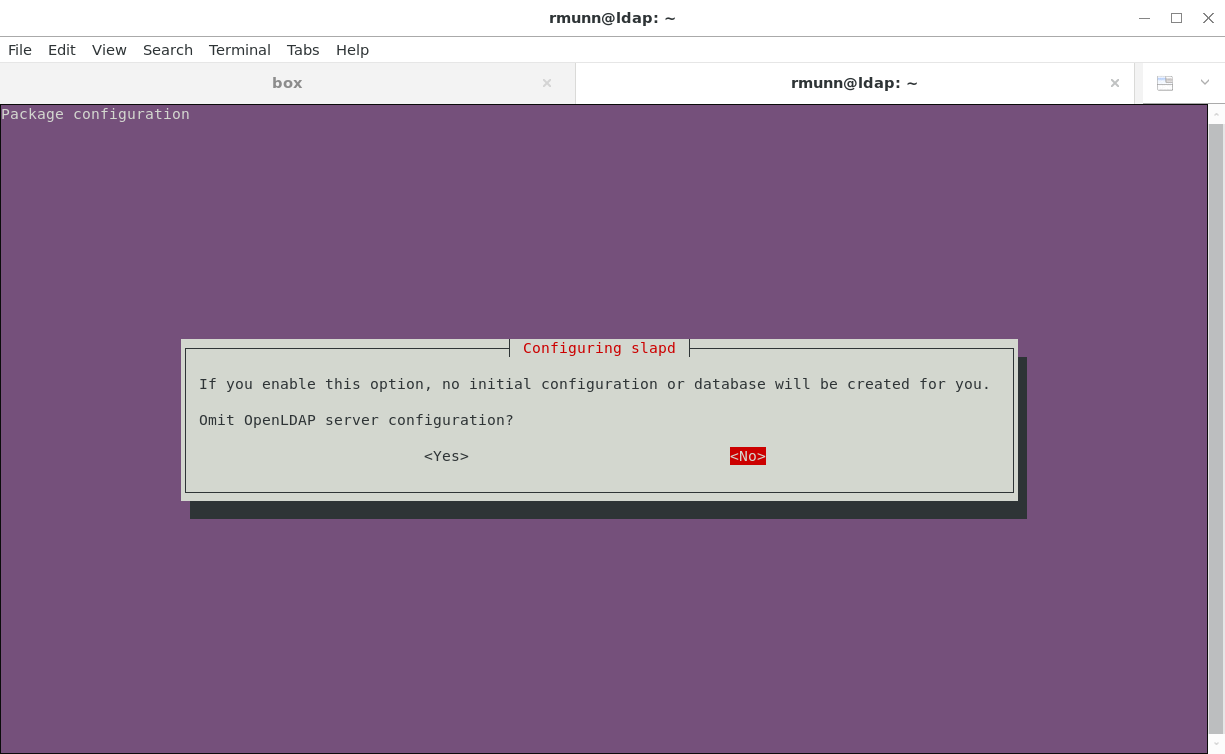
Follow the screenshots to configure slapd. We are going to configure our LDAP service hostname as ldap.shoestringlab.com. If you are installing LDAP in a production environment, choose a hostname appropriate for your network domain.
We need to create an initial configuration, so answer No at the first step:
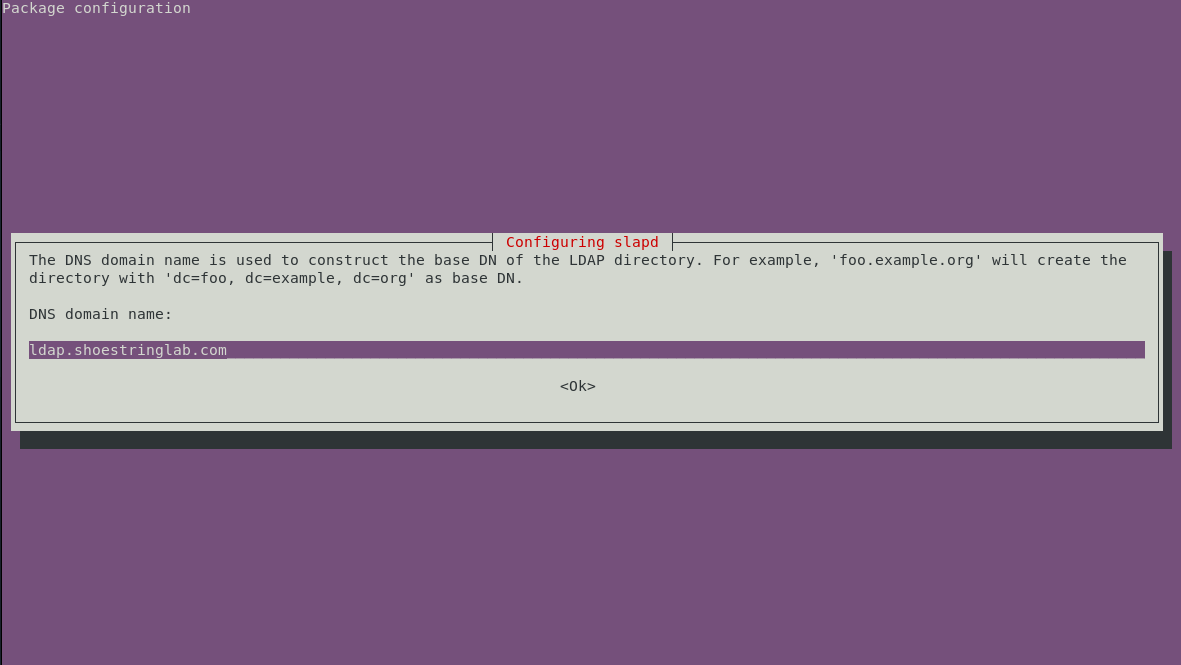
Next, we specify the fully qualified hostname of the service. This hostname is how other services and systems will contact the LDAP service:
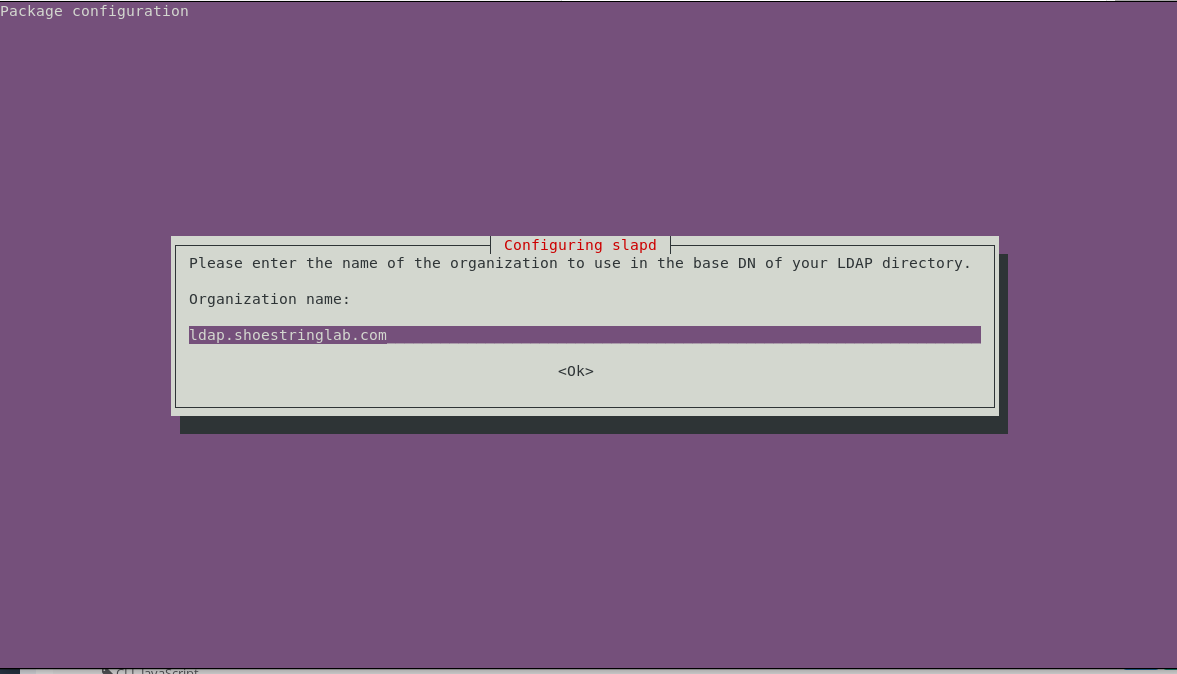
For the organization, if you don't know what to use, enter the same hostname as the LDAP service. This entry will be the "root" of the domain tree inside OpenLDAP:
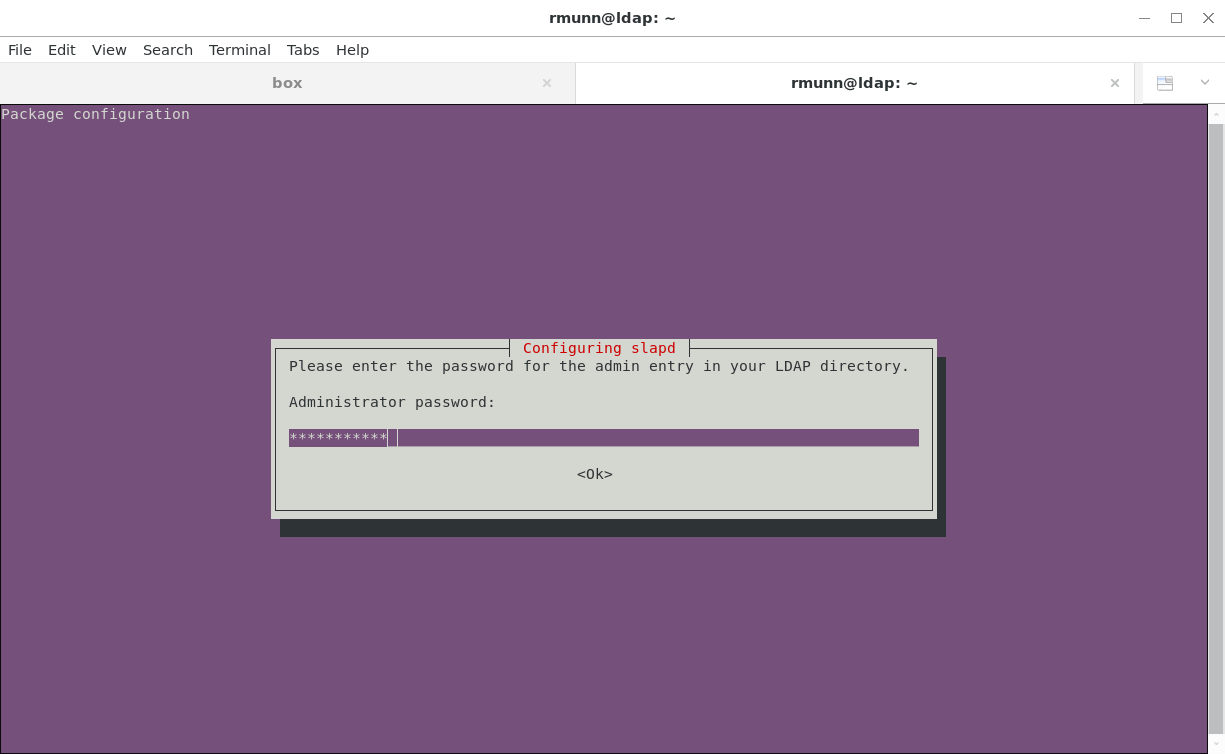
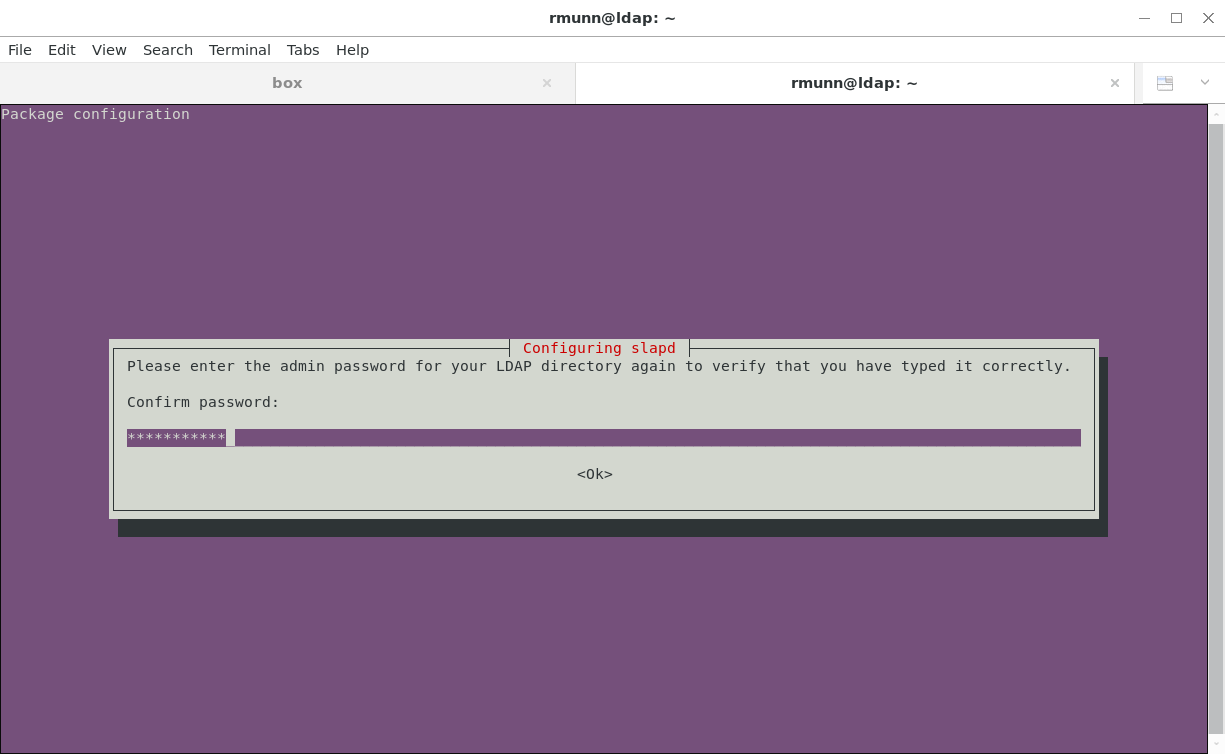
Next, enter the administrator password used to secure the OpenLDAP service. Don't lose this password- you will need it to access OpenLDAP later:
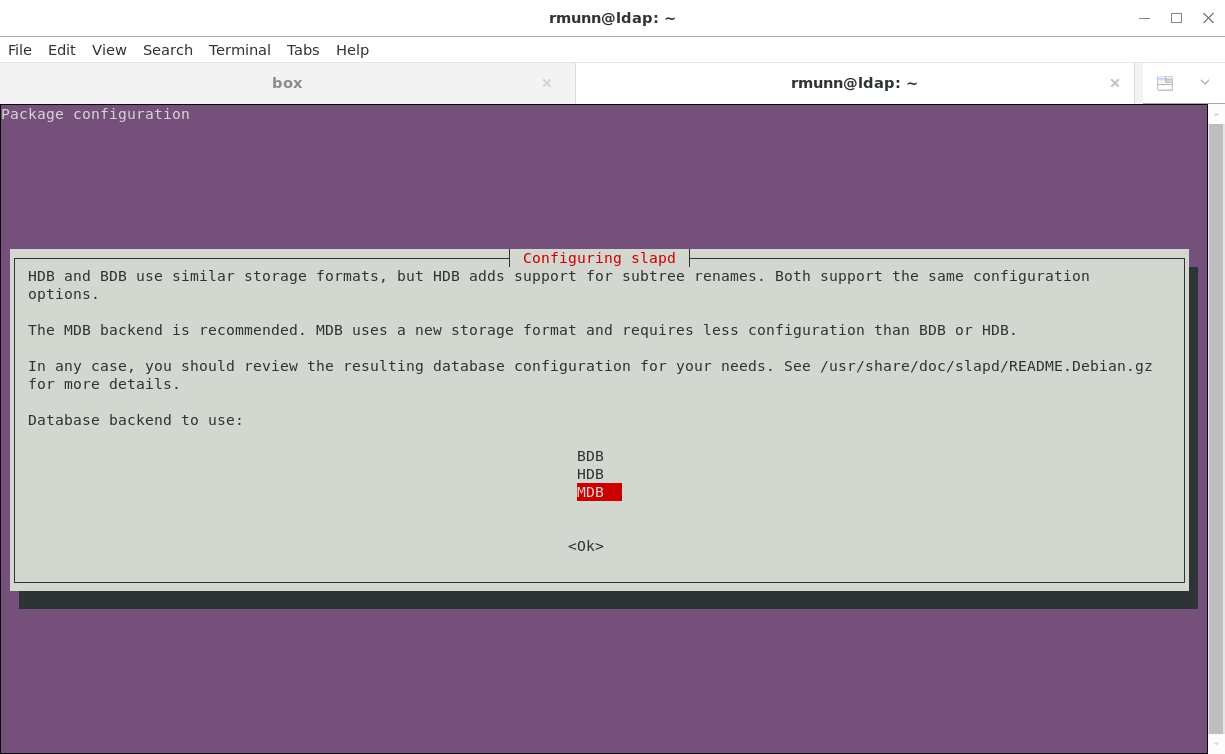
Use the MDB backend:
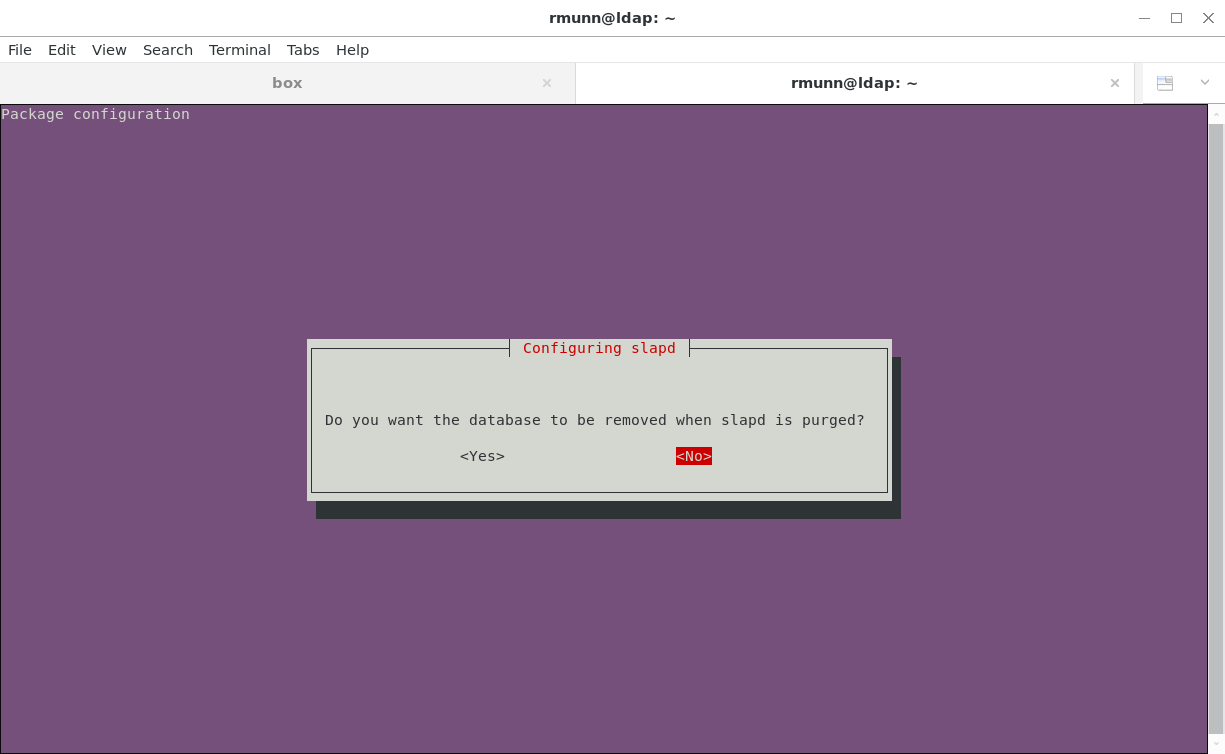
Your choice whether the remove the database when slapd is purged:
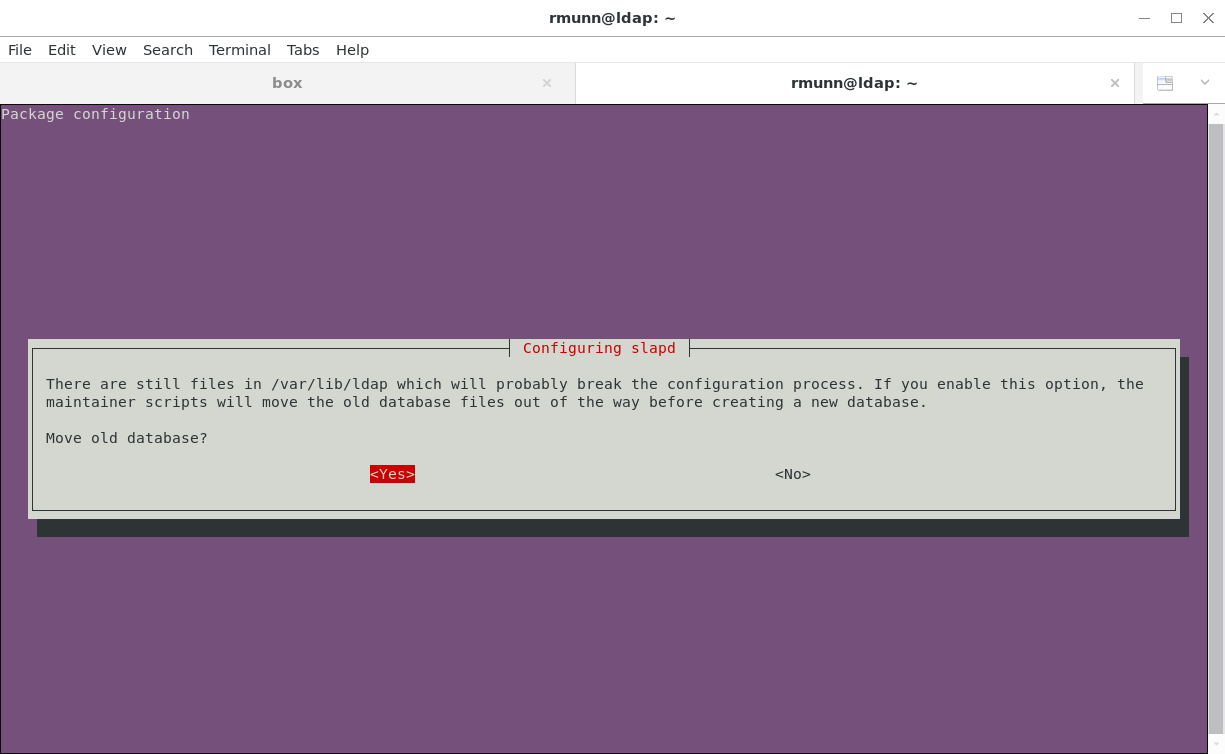
Move the old database so you don't break the configuration process:
Checking your install
$ service slapd status
Verify the service is running and is not returning an error.
Check that OpenLDAP responds to search queries:
$ sudo ldapsearch -Q -LLL -Y EXTERNAL -H ldapi:/// -b dc=ldap,dc=shoestringlab,dc=com dn

  dn: dc=ldap,dc=shoestringlab,dc=com

  dn: cn=admin,dc=ldap,dc=shoestringlab,dc=com
Modifying the LDAP Config
Per https://help.ubuntu.com/lts/serverguide/openldap-server.html.en
Modifying the configuration of OpenLDAP is done using the ldapmodify command, referencing a text file that contains the commands to modify the configuration.
Add an index to the mdb config.
add_index.ldif
-----------------------
dn: olcDatabase={1}mdb,cn=config
add: olcDbIndex
olcDbIndex: mail eq,sub
$ sudo ldapmodify -Q -Y EXTERNAL -H ldapi:/// -f add_index.ldif
Enable logging at the stats log level. This level will probably give you more logging than you need in production, so make a note to change the log level once your system is properly configured.
logging.ldif
-------------------
dn: cn=config
changetype: modify
replace: olcLogLevel
olcLogLevel: stats
$ sudo ldapmodify -Q -Y EXTERNAL -H ldapi:/// -f logging.ldif
Logging defined by olcLogLevel in:
https://www.openldap.org/doc/admin24/slapdconf2.html
Possible log levels:
| Level | Keyword | Description |
| -1 | any | enable all debugging |
| 0 | no debugging | |
| 1 | (0x1 trace) | trace function calls |
| 2 | (0x2 packets) | debug packet handling |
| 4 | (0x4 args) | heavy trace debugging |
| 8 | (0x8 conns) | connection management |
| 16 | (0x10 BER) | print out packets sent and received |
| 32 | (0x20 filter) | search filter processing |
| 64 | (0x40 config) | configuration processing |
| 128 | (0x80 ACL) | access control list processing |
| 256 | (0x100 stats) | stats log connections/operations/results |
| 512 | (0x200 stats2) | stats log entries sent |
| 1024 | (0x400 shell) | print communication with shell backends |
| 2048 | (0x800 parse) | print entry parsing debugging |
| 16384 | (0x4000 sync) | syncrepl consumer processing |
| 32768 | (0x8000 none) | only messages that get logged whatever log level is set |
Add Groups and People nodes. The People node will be the root of all entries of people into your LDAP server. The Groups node will be the root of all group entries. You can then add people to individual groups to provide granular level access control to resources in your network.
add_nodes.ldif
------------------------
dn: ou=people,dc=ldap,dc=shoestringlab,dc=com
objectClass: organizationalUnit
ou: People

dn: ou=groups,dc=ldap,dc=shoestringlab,dc=com
objectClass: organizationalUnit
ou: Groups
$ ldapadd -x -D cn=admin,dc=ldap,dc=shoestringlab,dc=com -W -f add_nodes.ldif
Add memberof configuration. The memberof module provides an easy way for the service to check whether a given person is a member of a given group.
memberof_config.ldif
-----------------------------------
dn: cn=module,cn=config
cn: module
objectClass: olcModuleList
olcModuleLoad: memberof
olcModulePath: /usr/lib/ldap

dn: olcOverlay={0}memberof,olcDatabase={1}mdb,cn=config
objectClass: olcConfig
objectClass: olcMemberOf
objectClass: olcOverlayConfig
objectClass: top
olcOverlay: memberof
olcMemberOfDangling: ignore
olcMemberOfRefInt: TRUE
olcMemberOfGroupOC: groupOfNames
olcMemberOfMemberAD: member
olcMemberOfMemberOfAD: memberOf
$ sudo ldapadd -Q -Y EXTERNAL -H ldapi:/// -f memberof_config.ldif
Add refint1 and refint2.
refint1.ldif
------------------
dn: cn=module{1},cn=config
add: olcmoduleload
olcmoduleload: refint
$ sudo ldapmodify -Q -Y EXTERNAL -H ldapi:/// -f refint1.ldif
refint2.ldif
-----------------
dn: olcOverlay={1}refint,olcDatabase={1}mdb,cn=config
objectClass: olcConfig
objectClass: olcOverlayConfig
objectClass: olcRefintConfig
objectClass: top
olcOverlay: {1}refint
olcRefintAttribute: memberof member manager owner
$ sudo ldapadd -Q -Y EXTERNAL -H ldapi:/// -f refint2.ldif
Implement required schemas for Linux user management. These schemas are in the /etc/ldap folder already.
sudo ldapadd -Y EXTERNAL -H ldapi:/// -f /etc/ldap/schema/cosine.ldif
sudo ldapadd -Y EXTERNAL -H ldapi:/// -f /etc/ldap/schema/nis.ldif
sudo ldapadd -Y EXTERNAL -H ldapi:/// -f /etc/ldap/schema/inetorgperson.ldif
Congratulations, you have now set up OpenLDAP on Ubuntu 18.04. Using this configuration, you can use OpenLDAP to manage user access to other systems. As a bonus, we have set up the base configuration to be able to manage Linux computer access using OpenLDAP. I will cover that topic later.