Re-factoring CFML Applications, Part 3
In Part 1 and Part 2 of this series, I laid out the background on web development, why there are many applications running today that need significant work to bring them up to date with current technology, and how you can plan a project to re-factor your application in FW/1 without re-writing from scratch. In this post, I will show you some practical strategies for re-factoring your old code into FW/1.
Starting Your Project
A big question to ask is whether you are going to re-factor your application in place (with the existing application living alongside it), so you can re-factor piece by piece, or whether you are going to start a new project with a clean codebase. On the big re-factoring projects I have worked on, we have always re-factored the code in place so we could implement the new code piece by piece. That requires careful planning since you may need to share application and session scope data among the old and new codebases. I will cover strategies for doing that in a separate post, for now just keep that in mind if you move forward with that kid of plan.
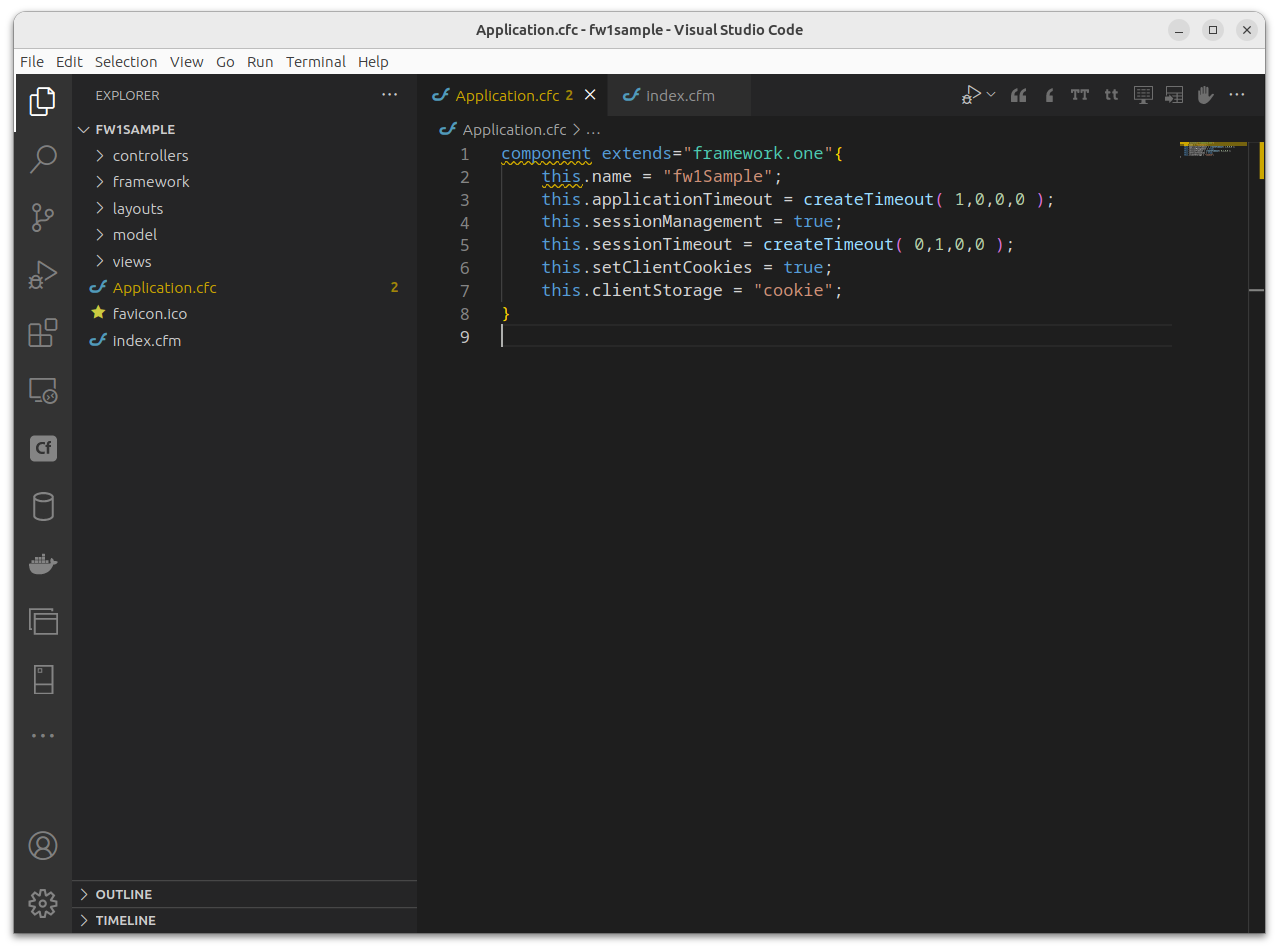
More generally, if I am re-factoring in place, I like to start re-factoring by cleaning up the project root. If you are re-factoring an application that is 15-20+ years old, more than likely there are a lot of things living in the project root that should not be there. I’ve encountered unprotected database access code, old test code, report code, and all manner of other things that were added to the root at one time or another for some short term reason and became an unofficial part of the application. Catalog everything in the root including what it does, check to see who is using it if anyone, and get rid of everything that is not accounted for as necessary to current functionality. Here is what a clean project root for an FW/1 application should look like. For in-place re-factoring, get as close to a clean root like this as possible.

For the purposes of this series, I am going to show re-factoring into an FW/1 project without subsystems and a single root, depicted in the file structure here. If you are interested in subsystems, take the time to read the FW/1 documentation and understand how to implement them.
A note about file sizes
One of the big problems I’ve seen with older code is the lack of encapsulation leading to individual files containing thousands of lines of code. Ideally, I like to keep file sizes to a few hundred lines at most. Beyond that, finding the code you are looking for becomes harder and harder, though the organization that FW/1 requires will aid in having things where you can find them. Of course, sometimes you need more code than that, and if so, that’s OK, just keep in mind that you can always divide your code further if you want to keep file sizes down.
Layouts
You need to create a base layout in /layouts/default.cfm that contains the default HTML wrapper for your views. From there, you can build different layouts based on your needs. Since you can’t see anything in your application without a default layout, creating the default layout should be among your first tasks.
Controllers
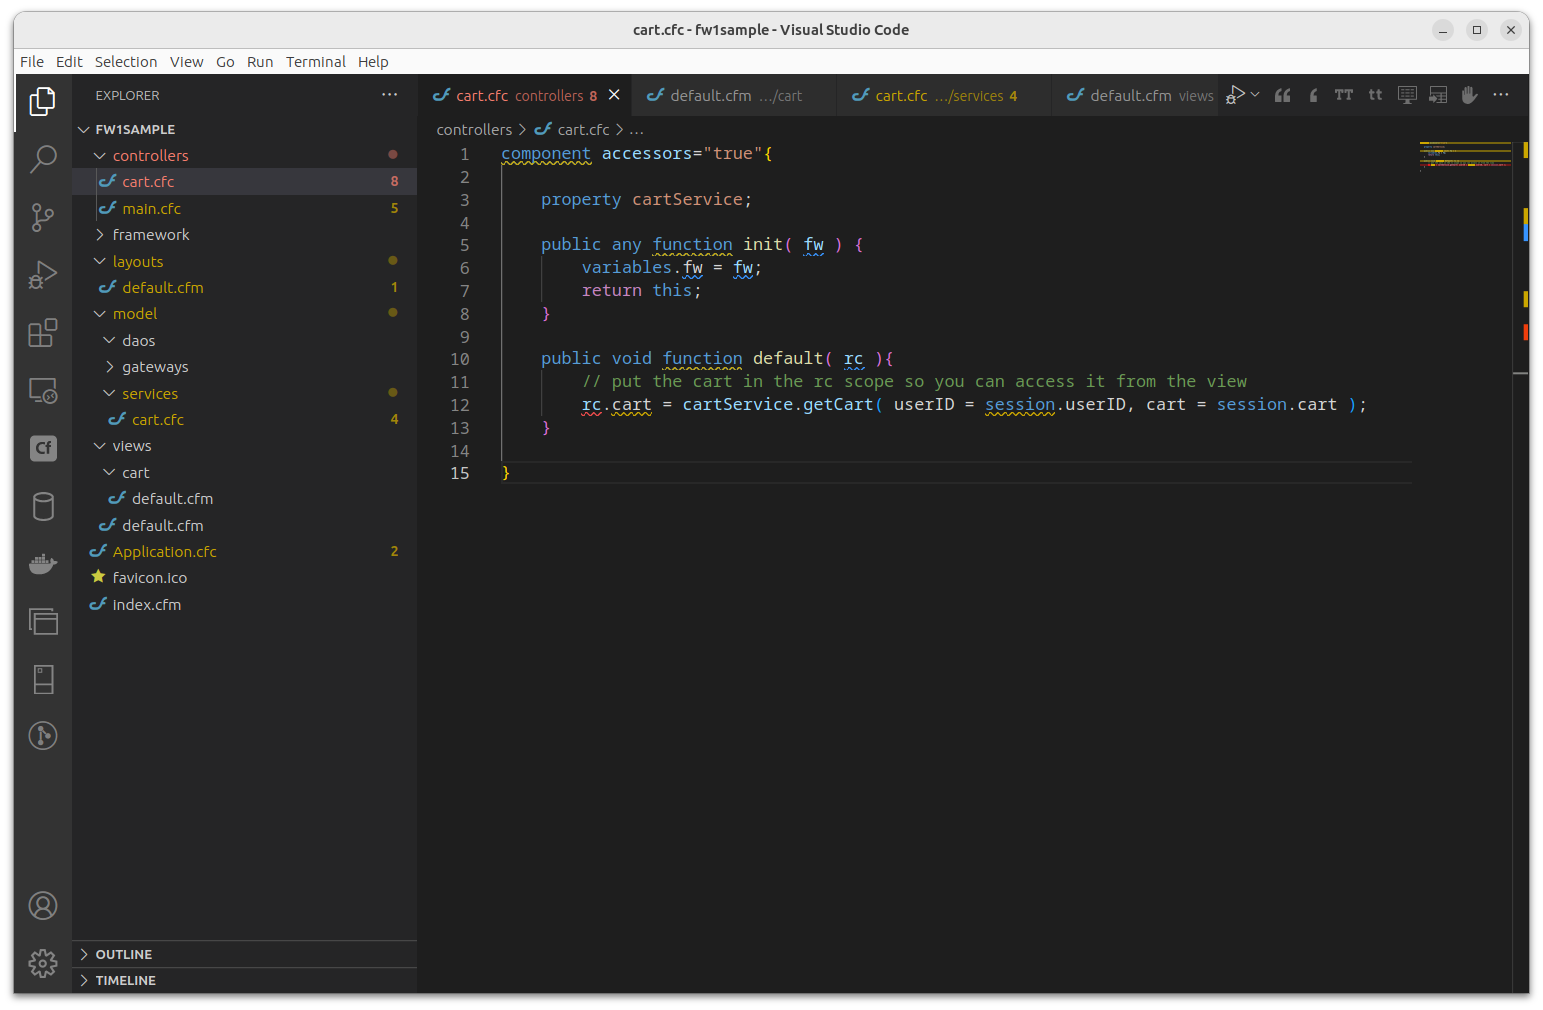
If you followed my advice from Part 2 of this series, you should have a list of screens/views for your existing application. Those views can roughly be mapped to controller actions and their views in the FW/1 application. Now you need to divide those views into distinct groups that can be mapped into individual controllers so you don’t end up with one giant controller containing everything in your application. For instance, if you have an ecommerce aspect to your site, you probably have a shopping cart. You might create a controller to contain all of the shopping cart logic. Here is an example of what that starts to look like.

Model
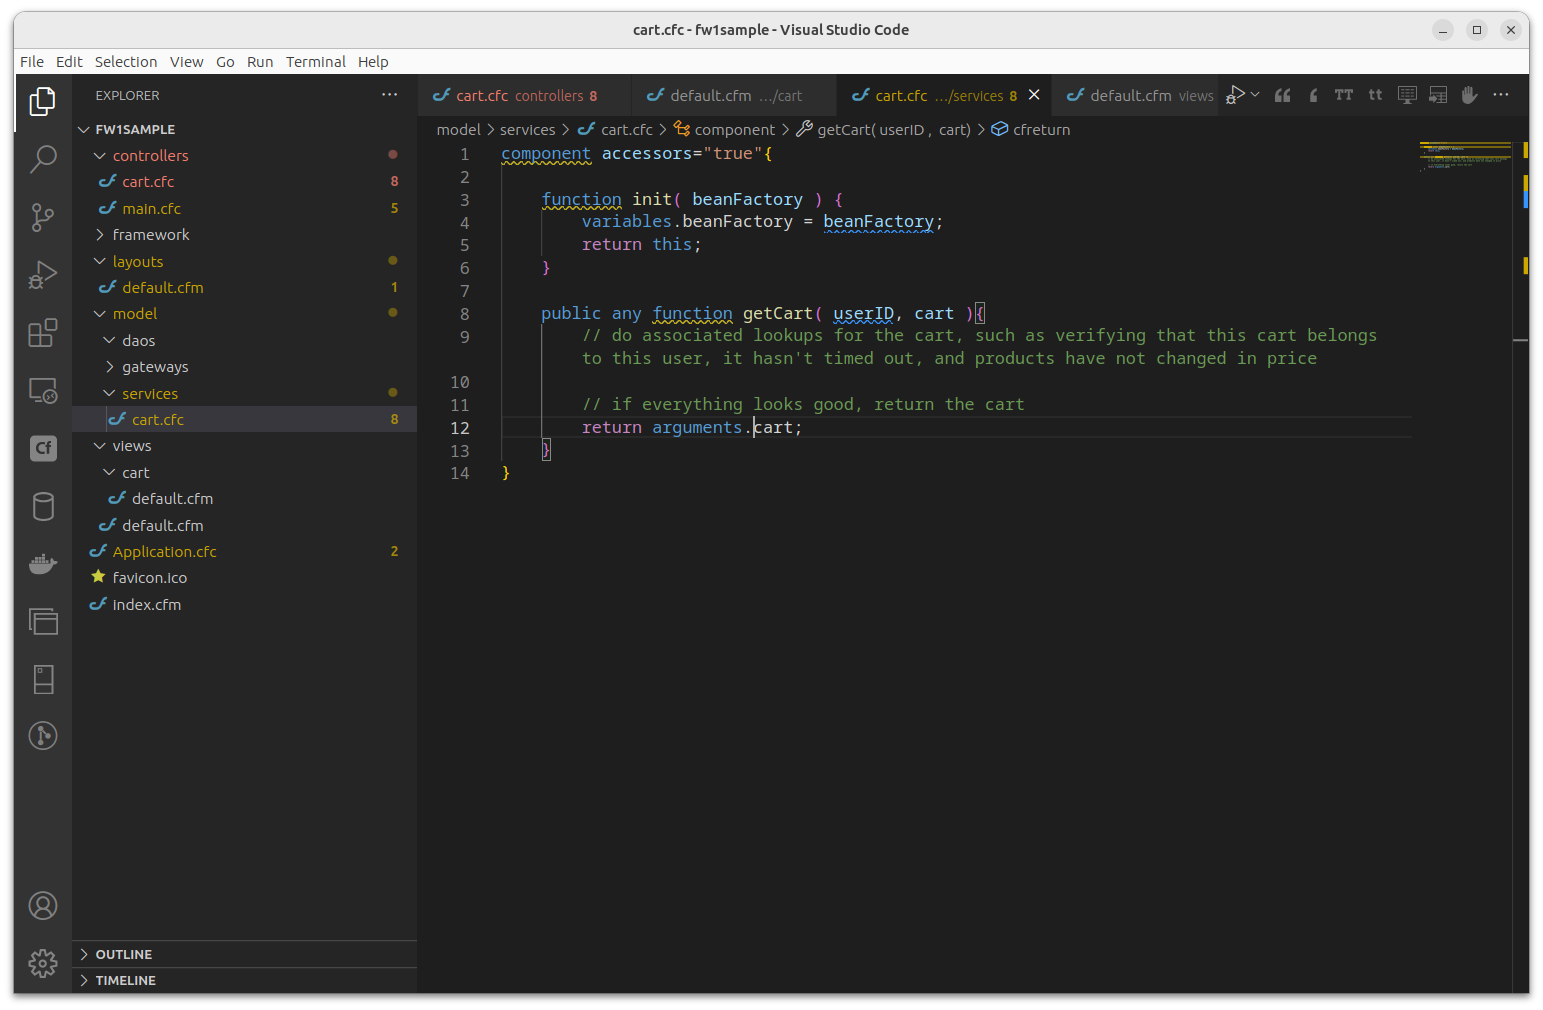
The model contains the persistence layer interaction code and associated services for your application, so all database interactions should be contained here. A typical older CFML application has database code throughout the application, resulting in difficult to maintain code. By consolidating your database code into a unified model, you can dramatically reduce the amount of database code in your application and minimize the effort needed to make changes to your persistence layer. In the example above, the cart default controller action calls cartService.getCart( userID, cart ). The idea here is to put code needed to pull the records for the cart from the database inside the model and not leave it inline in the controller. Note that I have not covered the cart object; I’ll do that in another post.

Views
Every controller action by default has an associated view that corresponds to its controller action, so controllers.cart.default will have a corresponding view at /views/cart/default.cfm. That is where you will put the display code for your cart. Data you pulled in the controller and assigned into the rc scope will still be available in the view in the rc scope, and that’s how you address it.
Note that if you are re-factoring your application as a single page application (SPA), you will not be using views for the most part.
In Summary
What I have laid out above is a very high level view of how you should structure your FW/1 application and begin to migrate code from your old CFML application into it. FW/1 tries its best to stay out of your way, and it does a great job of it in part by setting sensible defaults for settings so you don’t actually need to set up very much in order to get started, but it contains a huge number of optional settings that you can configure in order to suit your specific needs. I would argue that unless you have specific needs for your application, you should leave the default settings for FW/1 alone. As you dig into it, you may find specific things you need to change. Until then, stick with the defaults.
